


Disconnecting a car battery is easier than many people believe. With just a few basic tools and some simple instructions, you can handle this task yourself. This step-by-step guide will ensure you can safely and effectively disconnect a car battery.
How to Disconnect a Car Battery: Step-by-Step Guide
Locate the Battery
The first step is to find where your car battery is situated. Depending on the make and model of your vehicle, the battery can be in different places:
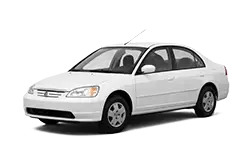
- Under the hood: Common in many newer vehicles and models like the Honda Civic.
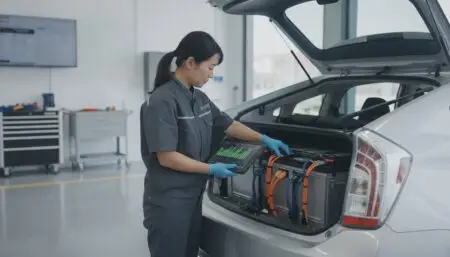
- In the trunk: Found in some models such as the Toyota Prius, specifically in the passenger side corner.
Remove the Battery Covers
Once you’ve located the battery, you may need to remove a few plastic covers or interior pieces to access it:
- Check for covers: Look for any plastic covers over the battery and terminals.
- Use appropriate tools: A flathead screwdriver or a clip puller is typically needed to remove these covers.
- Be gentle: Carefully remove the covers to avoid damaging any components.
Disconnect the Negative Terminal
Safety first! Always start with the negative terminal to minimize the risk of short-circuiting:
- Gather your tools: You’ll need a socket set and the right size tool to loosen the nuts on the battery terminals.
- Loosen the nut: Use your socket set to loosen the nut on the negative terminal.
- Remove the cable: Carefully lift the cable off the terminal and move it aside, ensuring it doesn’t touch any metal parts.
Disconnect the Positive Terminal
Now that the negative terminal is safely disconnected, proceed with the positive terminal:
- Loosen the nut: Use your socket set to loosen the nut on the positive terminal.
- Remove the cable: Carefully lift the cable off the terminal and move it aside.
Secure the Disconnected Terminals
To prevent any accidental reconnection or contact with metal, secure the disconnected terminals:
- Wrap the terminals: Use electrical tape to wrap the ends of the terminals.
- Position safely: Place the terminals in a position where they won’t come into contact with each other or any metal surfaces.
Consider Professional Help
If you’re unsure about any step or prefer not to perform the disconnection yourself, consider professional help:
- Auto shops: Many offer battery disconnection services.
- Mobile service: We provide a mobile service to assist with battery disconnection and other car maintenance needs at your location.
DIY Battery Disconnection
For those who prefer the DIY approach, disconnecting a car battery can be straightforward if you follow the steps correctly. Here’s why you might choose to do it yourself:
- Cost-effective: DIY can save you money compared to taking your car to a shop.
- Convenience: You can do it at your own pace and at a time that suits you.
- Satisfaction: There’s a sense of accomplishment in fixing things yourself.
In Summary
Disconnecting a car battery involves locating the battery, removing any covers, and using the right tools to disconnect the terminals safely. If you’re confident in your abilities, this can be a simple and rewarding task to perform yourself. However, if you’re unsure or uncomfortable, don’t hesitate to seek professional help.
If you need assistance or more information, contact us. Our team is ready to help with all your car maintenance needs.